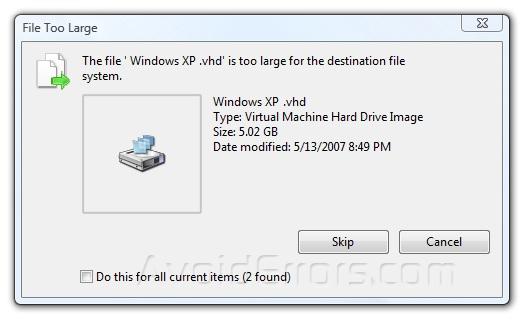
If you experience such a problem, most probably it’s caused by the fact that your flash drive is formatted with the FAT32 file system. This type of a file system has a built-in limitation on the size of the files that it may contain. Although the total size of the files that you can copy to a FAT32 drive could be as large as 2TB (or the physical capacity of the drive, whichever is smaller), the size of each individual file may not exceed 4GB.
This limitation may sound silly: why would anyone design a system that would not allow for the larger files? The problem is, when the FAT32 file system was designed (that was back in the days of Windows 95), no one anticipated that we would have such large files in use today. Or, maybe the designers hoped that by the time such large files become common, the use of the FAT32 system would be replaced by the more modern systems.
In any case, how to solve the problem of copying the 4GB files? Easy: you need to replace the FAT32 file system on the drive with the NTFS file system. The latter does not have the 4GB file size limitation, and it also allows for many other functions not supported by FAT32: file security, encryption, compression, etc.
One caveat, however: the older versions of Windows (such as Windows 95, 98, or Windows Millennium, remember those?) do not support the NTFS file system. If you plan on using the drive with such old computers, then DO NOT format the drive with NTFS, because you won’t be able to get the old Windows to recognize it anyway. If, however, you only plan on using the drive with the more recent versions of Windows, such as Windows 2000, Windows XP, Windows Vista, and of course Windows 7, such computers should work with the NTFS drives just fine.
How to change the drive from FAT32 to NTFS format?
There are several ways to go. If the drive is empty or contains no important files of yours, the easiest way is to use the Windows Format command to format the drive with the NTFS file system. Specifically:
1. Attach the external flash drive to the computer, wait for Windows to recognize it and assign a new drive letter to it.
2. Open the Computer folder and locate the drive letter assigned to the flash drive you want to format with NTFS (in the example below, it’s drive F:)
3. Before continuing, open the drive in a window and make sure it’s empty or does not contain any important files, because after you format a drive, all information that was on it will be erased! If there are files on the drive that you want to keep, take this opportunity to copy them over to the hard drive or some other drive.
4. If you are sure that the external drive contains no important files of yours, go back to the Computer folder, and right click on the icon of the external drive:

(Click to enlarge)

6. Make sure to select NTFS in the File System drop-down list. That’s what determines the kind of a file system that the drive should have. Also, you may want to select the Quick Format option, which should speed up the formatting process quite considerably.
7. Press Start, and Windows should warn you once again about erasing any existing information on the drive (see step 3 above). Again, if you are sure the drive does not contain any irreplaceable documents, confirm that you want to proceed with the formatting:

8. If you’ve selected the Quick format option, the formatting should take no longer than a minute or two.
As a result, you should have the same drive, but now it should have the NTFS files system on it. Now you should be able to copy the files larger than 4GB to the drive just fine.
You can use a Windows Command Prompt command to convert a FAT volume to NTFS. Open a Command Prompt window (Start | type CMD and Enter into the search dialog to open a window). To see the full syntax of the command and to verify that the command is present in your version of Windows type (no quotes) "CONVERT /?" at the command prompt and hit Enter. This should give you the help and if it comes up you have the command available to use. The command to convert any drive from FAT to NTFS would then be: CONVERT d: /FS:NTFS where d: is the drive letter of the disk/volume you wish to convert. If you want to watch the details add a /V (for verbose) to the command. Also, to enable all users to access the drive, just in case you might want to also add /NoSecurity to the command line. These latter two are optional and usually not needed.
Also, this procedure does not erase the disk so files should be safe. As in all things computer, having a backup of important files is critical no matter what and I'd be careful if the disk is almost full as FAT and NTFS disks likely have different sector sizes and therefore hold different amounts of information.
For queries and views use the comment form below. Subscribe and Like:D PEACE.
